Ningún producto
Precios con IVA incluído
Producto añadido correctamente a su carrito de la compra
Hay 0 artículos en su carrito. Hay 1 artículo en su cesta.
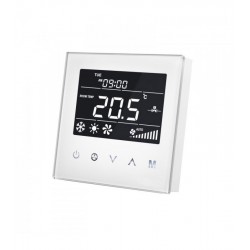
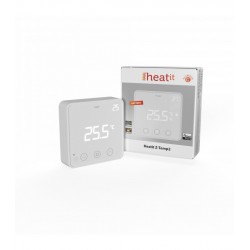
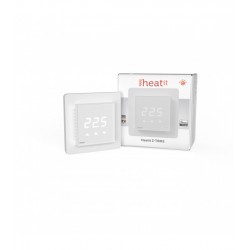
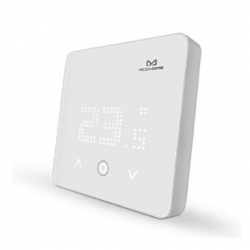
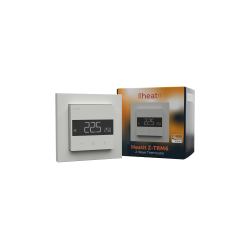
Heatit Z-Temp3 - Termostato Z-Wave a pilas para montaje en superficie
Nuevo
Termostato a pilas diseñado para controlar sistemas de clima. No dispone de relé interno, por lo que su uso habitual es en asociación directa Z-Wave con un relé auxiliar (no incluído) para manejar bombas, electroválvulas de suelo radiante o directamente la maniobra de marcha / paro de caldera de gas, gasoil, etc. De tecnología inalámbrica Z-Wave.
En Stock - Envío inmediato
- Eliminar de mis favoritos
- Agregar este producto a mis favoritos
- Imprimir
Características técnicas
| Tecnología Domótica | Z-Wave Serie 800 |
Descripción
Heatit Z-Temp3
- Serie Z-Wave 800 - Detección de ventana abierta
- Sensor de temperatura interno - 10 asociaciones por grupo
- Sensor de humedad - Pantalla LCD con retroiluminación
- Termostato maestro - Modo de bloqueo/bloqueo para niños
- Histéresis - PWM - Actualización de firmware (OTA)
- 3 modos: Calor - Frío - Eco - SmartStart
- Termostato a pilas para controlar relés y termostatos
- Soporta modos de encriptación S0, S2 Clase Autenticada, S2 No Autenticada Clase
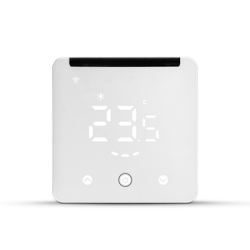
Heatit Z-Temp3 es un termostato a pilas diseñado para controlar sistemas de calefacción por agua. Utilizado en combinación con Heatit Z-Water2, puede controlar su sistema de calefacción a través de la red Z-Wave® o mediante los botones del panel frontal. El termostato tiene una interfaz fácil de usar.
Heatit Z-Temp3 tiene 3 modos: Calor, Frío y Eco.
El termostato encaja en los marcos del Sistema 55 y puede montarse junto a otros equipos como, por ejemplo, reguladores o interruptores de luz. Heatit Z-Temp3 también puede montarse directamente en la pared o colocarse libremente, por ejemplo, en una estantería.
Heatit Z-Temp3 puede configurarse como termostato maestro. Esto significa que puede ajustar la consigna y el modo en una unidad, y ésta enviará automáticamente la consigna y el modo a otras unidades conectadas.
Toda la comunicación entre Heatit Z-Temp3 y el dispositivo controlado es 100% inalámbrica.
Heatit Z-Temp3 utiliza 2 pilas AAA, pero también puede conectar el dispositivo a una fuente de alimentación externa. Para ello se recomienda el transformador Heatit 230VAC (45 126 48).
Heatit Z-Temp3 puede asociarse con Heatit ZM Single Relay, otros relés Z-Wave, Heatit ZM Thermostat, Heatit Z-TRM6 Thermostat y otros dispositivos Z-Wave para controlar otros tipos de soluciones de calefacción.
Heatit Z-Temp3 es una gran opción para la restauración o renovación de edificios existentes, ya que es fácil de instalar sin necesidad de cableado. Recomendamos utilizar varios dispositivos de 230 VCA para crear una red de malla.
Características
Z-Wave serie 800
Termostato a pilas para controlar relés y termostatos
Sensor de temperatura interno
Sensor de humedad
Termostato maestro
Histéresis - PWM
3 modos: Calor - Frío - Eco
Detección de ventana abierta
10 asociaciones por grupo
Pantalla LCD con retroiluminación
Modo de bloqueo/bloqueo para niños
Actualización de firmware (OTA)
SmartStart
Compatible con los modos de cifrado S0, S2 Clase autenticada, S2 Clase no autenticada
Datos técnicos
Protocolo IOT: Z-Wave - 868,4 MHz (UE)
Tensión:3,3 VDC
Histéresis:0,3 a 3,0 (histéresis por defecto 0,5)
Grado de protección (IP):IP21
Humedad ambiente (HR sin condensación %):10-85
Rango de temperatura ambiente en almacenamiento (°C):-30-70
Declaraciones:RoHS, Reach, RED
Estándar internacional:CE, Z-Wave Plus
Alcance de la señal de radiofrecuencia (nº máximo de metros):40
SDK:7.18.3
Tipo de chip IOT:Chip Z-Wave 800
Pulsadores:3
Modo de encriptación Z-Wave: S0, S2 Clase autenticada, S2 Clase no autenticada
Información Ampliada Z-Wave (Inglés)
• On the product.
• In the Quick Guide.
• On the packaging box/gift box.
The primary controller/gateway has a mode for adding devices. Please refer to your primary controller manual on how to set the primary controller in add mode. The device may only be added to the network if the primary controller is in add mode.
Adding the device within a 2 meter range from the gateway can minimize faults during the Interview process.
Note: The Heatit Z-Temp3 does not stay in Learn mode until it is included.
Standard (Manual)
Add mode is indicated on the device by rotating LCD segments on the display. It indicates this for 90 seconds until a timeout occurs, or until the device has been added to the network. Configuration mode can also be cancelled by performing the same procedure used for starting Configuration mode.
1. Hold the Center button for 5 seconds.
The display will show “OFF”.
2. Press the ”+” button once to see “CON” in the display.
3. Start the add device process in your primary controller.
4. Start the configuration mode on the thermostat by holding the Center button for approximately 2 seconds.
The device is now ready for use with default settings.
If inclusion fails, please perform a ”remove device” process and try again. If inclusion fails again, please see Chapter “Factory reset”.
The primary controller/gateway has a mode for removing devices. Please refer to your primary controller manual on how to set the primary controller in remove mode. The device may only be removed from the network if the primary controller is in remove mode.
When the device is removed from the network, it will NOT revert to factory settings.
Standard (Manual)
Remove mode is indicated on the device by rotating LCD segments on the display. It indicates this for 90 seconds until a timeout occurs, or until the device has been removed from the network. Configuration mode can also be cancelled by performing the same procedure used for starting Configuration mode.
1. Hold the Center button for 5 seconds.
The display will show “OFF”.
2. Press the ”+” button once to see “CON” in the display.
3. Start the remove device process in your primary controller.
4. Start the configuration mode on the thermostat by holding the Center button for approximately 2 seconds.
NB! When the device is removed from the gateway, the parameters are not reset. To reset the parameters, see Chapter ”Factory reset”.
When either of these procedures has been performed, the thermostat will perform a complete factory reset. The device will display “RES” for 5 seconds while performing a factory reset. When “RES” is no longer displayed, the thermostat has been reset.
Please use this procedure only when the primary controller is missing or otherwise inoperable.


