Sem produtos
Preços com IVA
Produto adicionado com sucesso ao seu carrinho de compras
Existem 0 produtos no seu carrinho de compras. Existe um produto no seu carrinho de compras.
Produtos visualizados
-

Shelly Qubino Wave 1 -...
Controle uma ampla gama de...
-

Régua de energia...
PDU inteligente 1U 10A gerenciada em...


Shelly Qubino Wave 1 - Micromódulo de contato seco Relé simples até 16A
QNSW-001X16EU
Novo
Controle uma ampla gama de dispositivos e equipamentos de escritório, como fechaduras elétricas, portões, portões de garagem, sistemas de irrigação, faixas de LED, luzes e tomadas, de qualquer lugar. O contato de saída é livre de tensão (contato seco), permitindo conectar diversas cargas de potência de até 16 A ao dispositivo.
Em estoque
- Retirar este produto da minha lista de favoritos.
- Adicionar este produto à minha lista de favoritos.

Características tecnicas
| Tecnologia Domótica | Z-Wave Serie 800 |
Mais Informação
Relé Z-Wave em formato de micromódulo de contato seco (sem potencial)
Consumo de energia extremamente baixo: 0,3 W.
Tecnologia mais recente: Chip Z-Wave Série 800
Banda de frequência Z-Wave: 868,4 MHz (países CEPT)
Configuração automática com SmartStart
Segurança 2 autenticada para o mais alto nível de segurança
Suporta atualizações de firmware over-the-air (OTA)
Funciona com gateways Z-Wave certificados e mais de 4.000 dispositivos Z-Wave
*Um controlador de automação residencial (smart hub) não está incluído. Um gateway Z-Wave (hub inteligente) é necessário para configuração do dispositivo.
O módulo Shelly Qubino Wave 1 é um switch integrado Z-Wave 800 com saída livre de potencial. O módulo foi projetado para controlar dispositivos como fechaduras elétricas, portas de garagem, portas de entrada, sistemas de irrigação, tomadas e iluminação. Com capacidade de carga máxima de 16A, o módulo fornece energia suficiente para diversas aplicações. É possível controlar o módulo sem fio via Z-Wave, bem como através de um interruptor de parede.
O módulo pode ser alimentado com tensão de 110-240 V CA, 24-48 V CC ou 12 V CC, proporcionando flexibilidade na alimentação. Além disso, a saída não tem potencial, o que significa que a tensão de entrada pode ser diferente do dispositivo que você deseja comutar. Isto permite compatibilidade com vários dispositivos elétricos. Além disso, o módulo está equipado com proteção contra superaquecimento.
Shelly Qubino é alimentado por Z-Wave
Ao usar o Z-Wave, os produtos domésticos inteligentes podem se comunicar perfeitamente entre si, independentemente da marca ou plataforma, graças a um hub inteligente centralizado! Os dispositivos Shelly Qubino são alimentados pela última geração de chips Z-Wave (S800), uma das tecnologias domésticas inteligentes padronizadas mais populares do mundo.
*Os dispositivos Z-Wave têm requisitos específicos para funcionar corretamente, como a necessidade de usar um hub Z-Wave compatível.
Para obter mais informações, visite o site oficial da Z-wave: www.z-wave.com.
Funciona com qualquer controlador de automação residencial Z-Wave
O Wave 1 foi adaptado e projetado para caber atrás de qualquer interruptor ou tomada, transformando-o instantaneamente em um dispositivo inteligente. Depois de instalado, inclua-o em sua rede Z-Wave (é necessário gateway Z-Wave) e controle os aparelhos conectados de qualquer lugar usando seu smartphone ou tablet. Os dispositivos Shelly Qubino funcionam com mais de 4.000 dispositivos e gateways certificados Z-Wave.
Caracteristicas
Funciona com tecnologia Z-Wave
Conecte o Wave 1 à sua rede Z-Wave e controle-o remotamente. É compatível com todos os gateways Z-Wave certificados.
Associações
Estabeleça comunicação direta entre dispositivos em sua rede Z-Wave local e configure ações personalizadas sem a necessidade de um hub.
contato seco
Conecte diferentes cargas de potência (até 16 A) ao dispositivo, que possui um relé interno livre de potencial (contato seco) isolado eletricamente da alimentação do próprio micromódulo.
Ampla faixa de tensão
Usa uma ampla gama de níveis de tensão de saída. Suporta baixas tensões.
Agendamentos personalizados
Crie horários personalizados alinhados com sua rotina diária ou sincronize com o nascer/pôr do sol para gerenciar sua iluminação (é necessário gateway).
Cenas inteligentes
Configure cenas personalizadas combinando Wave 1 com qualquer outro dispositivo Z-Wave (gateway necessário)...
Infinitas aplicações de uso
Automatize seu sistema de irrigação de jardim sem esforço
Manter o seu jardim verde com um estilo de vida agitado pode ser um desafio, mas com um sistema de irrigação automatizado, você pode gerenciar facilmente as necessidades de irrigação do seu jardim com um toque no seu smartphone, mesmo quando estiver de férias. Para total tranquilidade, basta programar a rega e os aspersores serão ligados e desligados automaticamente. Sim, é fácil.
Controle o portão da sua garagem remotamente
Você fechou o portão da garagem ao sair de casa? A partir de agora basta conferir no seu smartphone. A Onda 1 possui tensões operacionais de 12V DC e 24-48V DC, tornando-a perfeita para controle de portas de garagem.
Estabeleça parcerias e deixe sua casa recebê-lo
Configure o Wave 1 e outros dispositivos em sua rede Z-Wave e crie associações entre eles para comunicação direta sem gateway. Automatize a fechadura e as luzes das portas e estabeleça uma regra: sempre que a porta da frente for destrancada, as luzes do lobby/corredor acendem.
Automatize suas luzes e faça-as seguir sua programação
Torne qualquer interruptor de luz inteligente com Shelly Wave 1 e controle-o através do seu telefone ou com um assistente de voz. Use seu aplicativo hub para configurar cenas automatizadas com base em um horário ou pôr do sol/nascer do sol. Dessa forma, você pode programar as luzes da varanda para acenderem na hora em que você chegar do trabalho ou as luzes do corredor para apagarem após a hora de sua família dormir. E não se preocupe: os interruptores de luz ainda podem ser usados manualmente para atender às necessidades de todos na sua casa.
AS ESPECIFICAÇÕES TÉCNICAS
| Alimentando | 110-240 V CA / 24-48 V CC / 12 V CC ± 10% |
|---|---|
| Consumo em repouso | <0,3 W |
| Tensão máxima do relé em AC | 240V |
| Corrente máxima do relé em AC | 16A |
| Tensão máxima do relé em DC | 30V |
| Corrente máxima do relé em DC | 10A |
| Proteção contra superaquecimento | Sim |
| Distância | Até 40 m em ambientes internos (131 pés) (depende das condições locais) |
| Repetidor "Z-Wave": | SIM |
| Lasca | Onda Z" S800 |
| Frequências de onda Z": | 868,4 MHz; 865,2 MHz; 869,0 MHz; 921,4 MHz; 908,4 MHz; 916 MHz; 919,8 MHz; 922,5 MHz; 919,7-921,7-923,7 MHz; 868,1 MHz; 920,9 MHz |
| Potência máxima de radiofrequência transmitida na(s) banda(s) de frequência | <25mW |
| Tamanho (A x L x P) | 37x42x16 ±0,5 mm / 1,46x1,65x0,63 ±0,02 pol. |
| Peso | 26g/0,92 onças. |
| Montagem | Caixa de mecanismo ou caixa de registro |
| Torque máximo de aperto Terminais de parafuso | 0,4 Nm/3,5 lb.in. |
| Seção do motorista | 0,5 a 1,5 mm² / 20 a 16 AWG |
| Comprimento Despojado do Condutor | 5 a 6 mm/0,20 a 0,24 pol. |
| Material de habitação | Plástico |
| Cor | Azul |
| Temperatura ambiente | -20°C a 40°C / -5°F a 105°F |
| Umidade | 30% a 70% UR |
| Máx. altitude | 2.000 m/6.562 pés. |
Informação alargada da Z-Wave (Inglês)
The first five digits of the key are highlighted or underlined to help the user identify the PIN Code part of the DSK text. The DSK is additionally represented with a QR Code as shown on the image.
Note! All Device outputs (O, O1, O2, etc. - depending on the Device type) will turn the load 1s on/1s off /1s on/1s off if the Device is successfully added to/removed from a Z-Wave™ network.
6.1.1 SmartStart adding (inclusion)
SmartStart enabled products can be added into a Z-Wave™ network by scanning the Z-Wave™ QR Code present on the Device with a gateway providing SmartStart inclusion. No further action is required, and the SmartStart device will be added automatically within 10 minutes of being switched on in the network vicinity.
1. With the gateway application scan the QR code on the Device label and add the Security 2 (S2) Device Specific Key (DSK) to the provisioning list in the gateway.
2. Connect the Device to a power supply.
3. Check if the blue LED is blinking in Mode 1. If so, the Device is not added to a Z-Wave™ network.
4. Adding will be initiated automatically within a few seconds after connecting the Device to a power supply, and the Device will be added to a Z-Wave™ network automatically.
5. The blue LED will be blinking in Mode 2 during the adding process.
6. The green LED will be blinking in Mode 1 if the Device is successfully added to a Z-Wave™ network.
6.1.2 Adding (inclusion) with a switch/push-button
1. Connect the Device to a power supply.
2. Check if the blue LED is blinking in Mode 1. If so, the Device is not added to a Z-Wave™ network.
3. Enable add/remove mode on the gateway.
4. Toggle the switch/push-button connected to any of the SW terminals (SW, SW1, SW2, etc.) 3 times within 3 seconds (this procedure puts the Device in Learn mode*). The Device must receive on/off signal 3 times, which means pressing the momentary switch 3 times, or toggling the switch on and off 3 times.
5. The blue LED will be blinking in Mode 2 during the adding process.
6. The green LED will be blinking in Mode 1 if the Device is successfully added to a Z-Wave™ network.
*Learn mode - a state that allows the Device to receive network information from the gateway.
6.1.3 Adding (inclusion) with the S button
1. Connect the Device to a power supply.
2. Check if the blue LED is blinking in Mode 1. If so, the Device is not added to a Z-Wave™ network.
3. Enable add/remove mode on the gateway.
4. To enter the Setting mode, quickly press and hold the S button on the Device until the LED turns solid blue.
5. Quickly release and then press and hold (> 2s) the S button on the Device until the blue LED starts blinking in Mode 3. Releasing the S button will start the Learn mode.
6. The blue LED will be blinking in Mode 2 during the adding process.
7. The green LED will be blinking in Mode 1 if the Device is successfully added to a Z-Wave™ network.
Note! In Setting mode, the Device has a timeout of 10s before entering again into Normal mode.
Note! The Device will be removed from your Z-wave™ network, but any custom configuration parameters will not be erased.
Note! All Device outputs (O, O1, O2, etc. - depending on the Device type) will turn the load 1s on/1s off /1s on/1s off if the Device is successfully added to/removed from a Z-Wave™ network.
6.2.1 Removing (exclusion) with a switch/push-button
1. Connect the Device to a power supply.
2. Check if the green LED is blinking in Mode 1. If so, the Device is added to a Z-Wave™ network.
3. Enable add/remove mode on the gateway.
4. Toggle the switch/push-button connected to any of the SW terminals (SW, SW1, SW2,…) 3 times within 3 seconds (this procedure puts the Device in Learn mode). The Device must receive on/off signal 3 times, which means pressing the momentary switch 3 times, or toggling the switch on and off 3 times.
5. The blue LED will be blinking in Mode 2 during the removing process.
6. The blue LED will be blinking in Mode 1 if the Device is successfully removed from a Z-Wave™ network.
6.2.2 Removing (exclusion) with the S button
1. Connect the Device to a power supply.
2. Check if the green LED is blinking in Mode 1. If so, the Device is added to a Z-Wave™ network.
3. Enable add/remove mode on the gateway.
4. To enter the Setting mode, quickly press and hold the S button on the Device until the LED turns solid blue.
5. Quickly release and then press and hold (> 2s) the S button on the Device until the blue LED starts blinking in Mode 3. Releasing the S button will start the Learn mode.
6. The blue LED will be blinking in Mode 2 during the removing process.
7. The blue LED will be blinking in Mode 1 if the Device is successfully removed from a Z-Wave™ network.
Note! In Setting mode, the Device has a timeout of 10s before entering again into Normal mode.
6.3.1 Factory reset general
After Factory reset, all custom parameters and stored values (kWh, associations, routings, etc.) will return to their default state. HOME ID and NODE ID assigned to the Device will be deleted. Use this reset procedure only when the gateway is missing or otherwise inoperable.
6.3.2 Factory reset with a switch/push-button
Note! Factory reset with a switch/push-button is only possible within the first minute after the Device is connected to a power supply.
1. Connect the Device to a power supply.
2. Toggle the switch/push-button connected to any of the SW terminals (SW, SW1, SW2,…) 5 times within 3 seconds. The Device must receive on/off signal 5 times, which means pressing the push-button 5 times, or toggling the switch on and off 5 times.
3. During factory reset, the LED will turn solid green for about 1s, then the blue and red LED will start blinking in Mode 3 for approx. 2s.
4. The blue LED will be blinking in Mode 1 if the Factory reset is successful.
6.3.3 Factory reset with the S button
Note! Factory reset with the S button is possible anytime.
1. To enter the Setting mode, quickly press and hold the S button on the Device until the LED turns solid blue.
2. Press the S button multiple times until the LED turns solid red.
3. Press and hold (> 2s) S button on the Device until the red LED starts blinking in Mode 3. Releasing the S button will start the factory reset.
4. During factory reset, the LED will turn solid green for about 1s, then the blue and red LED will start blinking in Mode 3 for approx. 2s.
5. The blue LED will be blinking in Mode 1 if the Factory reset is successful.
6.3.4 Remote factory reset with parameter with the gateway
Factory reset can be done remotely with the settings in Parameter No. 120.
Avaliações
30 outros produtos na mesma categoria:
-
Bypass para...
-
Philio...
-
AEOTEC -...
-
AEOTEC -...
-
AEOTEC -...
-
Aeotec Nano...
-

Aeotec Nano...
-
Chave de...
-
WiDom Smart...
-

Fibaro...
-
Micromódulo...
-
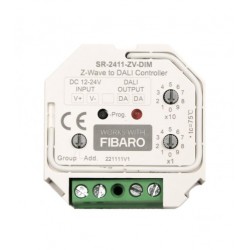
Controlador...
-

FIBARO...
-
HELTUN -...
-
Heatit ZM...
-
Philio...
-

ZOOZ...
-
Philio...
-
Philio...
-
Controlador...
-
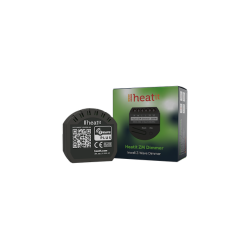
Heatit ZM...
-
Termostato...
-

Shelly...
-
Shelly...
-
Shelly...
-

FIBARO...
-
Shelly...
-
Shelly...
-
Shelly...
-
Shelly...